Flutter Sign In with Apple using Firebase
I just had a horrible experience figuring this out, so this short write-up is to save someone some banging-head-against-wall time...
The code for this is dead simple, which is great, but the documentation for configuration is embarrassingly bad, so I'm writing this down. (Firebase team, if you're reading this, maybe try out your own documentation? Or copy/paste this – that's fine by me.)
So let's jump right in...
High-level overview
Here's a quick overview of what you have to do to make Apple happy and allow Sign-in with Apple. Note that it's 95% configuration, clicking, choosing IDs, and copying/pasting stuff. Luckily you do this once for your app and (hopefully) never again.
- Sign up for an Apple Developer account (this takes time and is long, so we'll assume you already have an account)
- Create an App ID
- Create a Service ID
- Create a Key
- Set your "return URL" so that Apple knows to talk to Firebase
- Enable Apple sign-in in the Firebase console
- Give Firebase all these IDs and keys so that it can talk to Apple on your behalf
- (on iOS) Add the "capability" (like Permissions in Android) for Sign In with Apple
- Write two lines of Dart to sign in with Apple (and then some more to actually do something with the user credential)
- Great success
Create an Apple Developer account
Start by going to <URL> to sign up for an Apple Developer account. Pay them some money, wait 48 hours, maybe send them a copy of your government ID, etc. Ultimately you'll get access to the Apple Developer stuff.
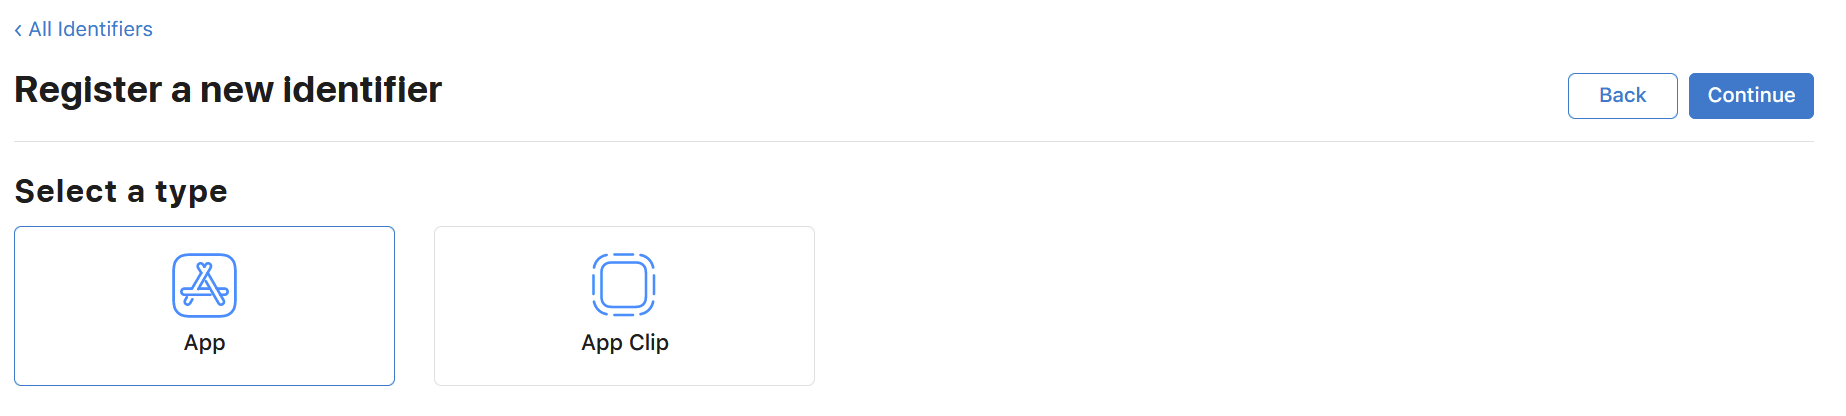
Create an App ID
Start by going to https://developer.apple.com/account/resources/identifiers/list/bundleId (you should see "App IDs" in the top right corner).

Click the plus sign next to Identifiers to create a new one. Choose App IDs on the next page and click Continue.

Choose App (not App Clip) on the next page. (I think ... I'm not sure what an App Clip is...) Then click Continue.
Enter in the basic details for your App. Put whatever you want for the description (you can always change this later) and choose a reverse-domain style ID for the Bundle ID (e.g., com.myapp.bundleid)
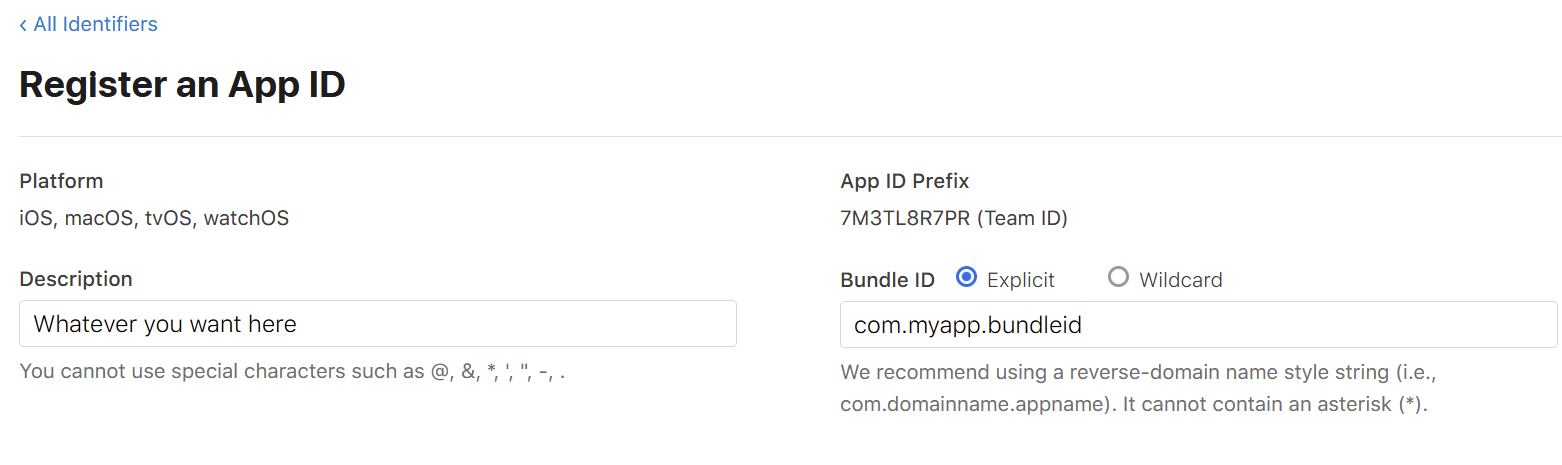
Then scroll down for a while and check the box next to "Sign In with Apple". It should automatically say "Enable as Primary App ID". Apparently this means other stuff that we'll do in the future (e.g., creating Services and whatnot) will be hooked up to this App ID.

Scroll back up and click Register to finish off this part.
Create a Service ID
Start by going to https://developer.apple.com/account/resources/identifiers/add/serviceId. Click continue.
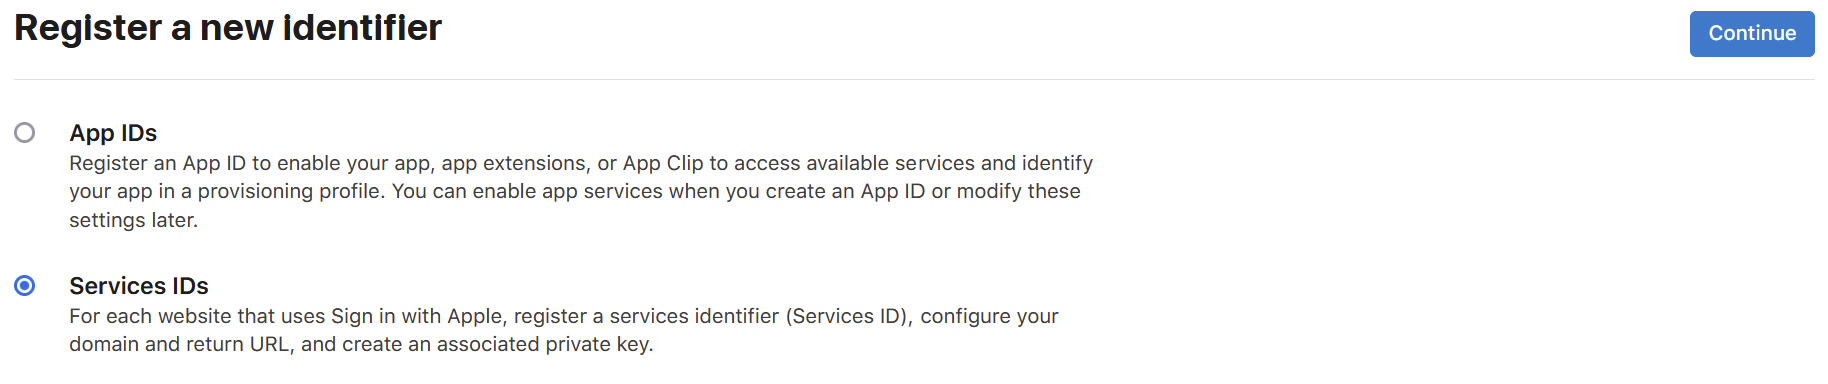
On the next screen, enter some data. For description, write whatever you want that will help you remember what app this is associated with (you can always change this later). For the ID, you have to choose something unique. To keep things simple for future me, I chose com.myapp.bundleid.service (in other words, I took the App ID from before and added .serviceto the end). Then click Continue.

On the next page, confirm everything looks OK (check for typos) and click Register.

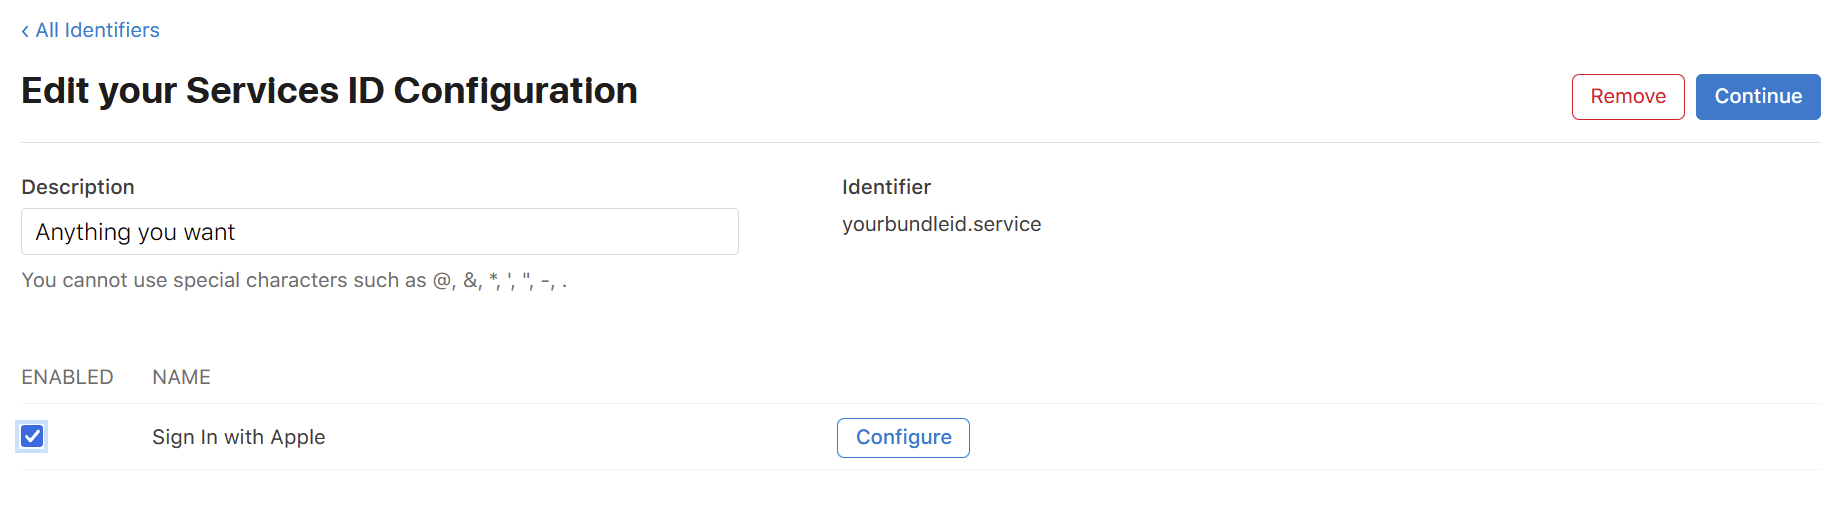
Enable Sign In with Apple on the Service
On the list of Services, click on the one you just created (like you're going to edit it). Once there, check the box for "Sign In with Apple".
Create a Key
Start by going to https://developer.apple.com/account/resources/authkeys/list. Click the little plus sign next to "Keys"

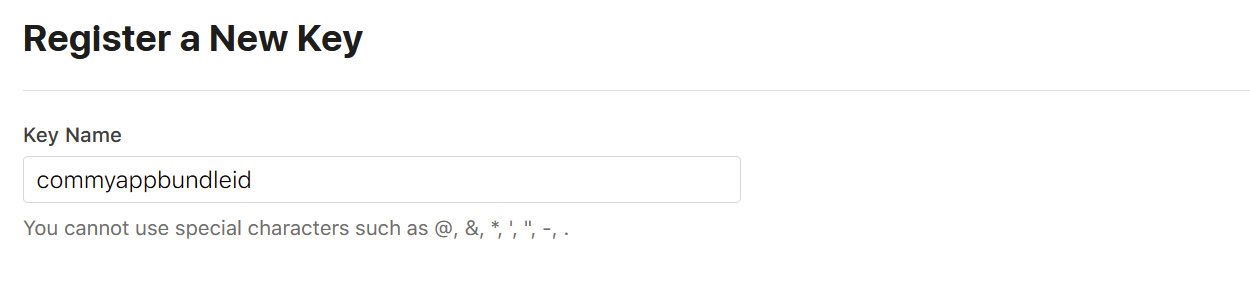
Choose a key name. To keep things simple, I use the App ID without any dots (e.g., if your App ID is com.myapp.bundleid, I'd make the key ID be commyappbundleid. It's ugly and tougher to read, but keys cannot have the common special characters that make this stuff readable. Whoops.
Check the checkbox next to "Sign in with Apple" and then click "Configure".

For the Primary App ID, choose the App ID you created earlier. Then click Save.
<TODO: Add screenshot of this>
Once you have that, download the key itself (it's a .p8 file). Save this for later because you won't be able to download it again (and you'll need to give it to Firebase).
<TODO: Add screenshot of downloading the key>
Update your return URL
Now that we have all the pieces created, we can start stitching them together with Firebase.
It turns out that Firebase can handle the redirects for you, but you need to make sure to tell Apple how to talk to Firebase. For this, there's a special URL that Firebase creates for you (https://YOUR_FIREBASE_APP_ID.firebaseapp.com/__/auth/handler) but we need to give that to Apple.
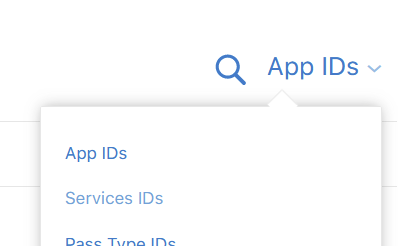
To do this, go back to the identifiers page (https://developer.apple.com/account/resources/identifiers/list). In the top right corner (that says App IDs), choose Service IDs.
Click on the Service ID you created earlier.
Once there, check the checkbox next to "Sign in with Apple".
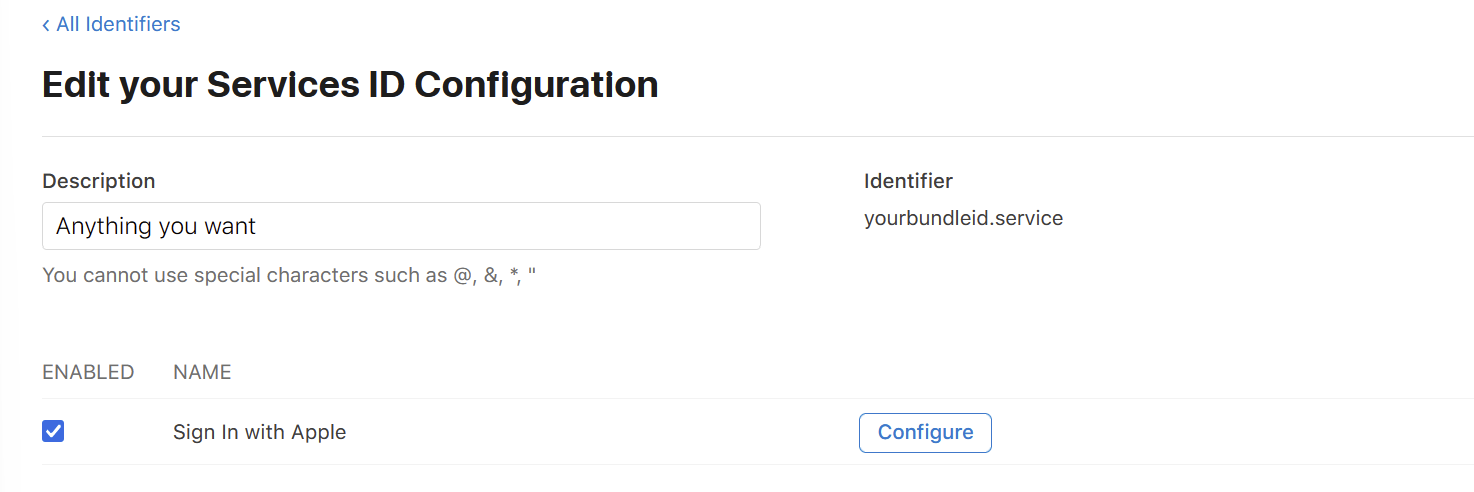
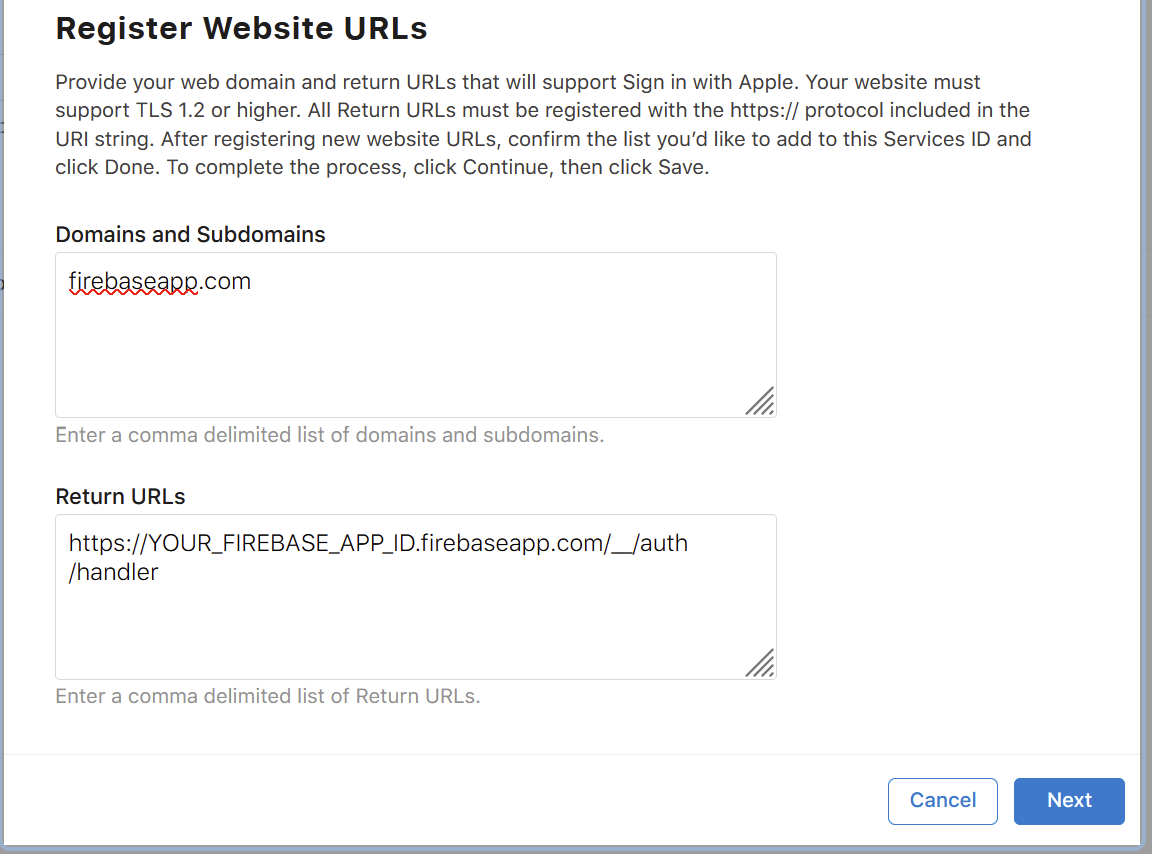
Then click "Configure". Under "Primary App ID", choose the App ID you created earlier. Under website URLs, there are two big boxes. In Domains and Subdomains, add firebaseapp.com. In Return URLs, add your special Firebase URL.
Then click Next.
Enable Apple sign-in in the Firebase console
Now Apple knows how to talk to Firebase, but we need to make sure that Firebase knows how to talk to Apple on your behalf.
Give Firebase all the IDs and Keys
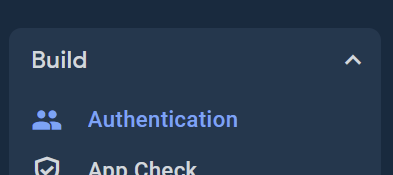
Login to your Firebase console and then go to Build -> Authentication.
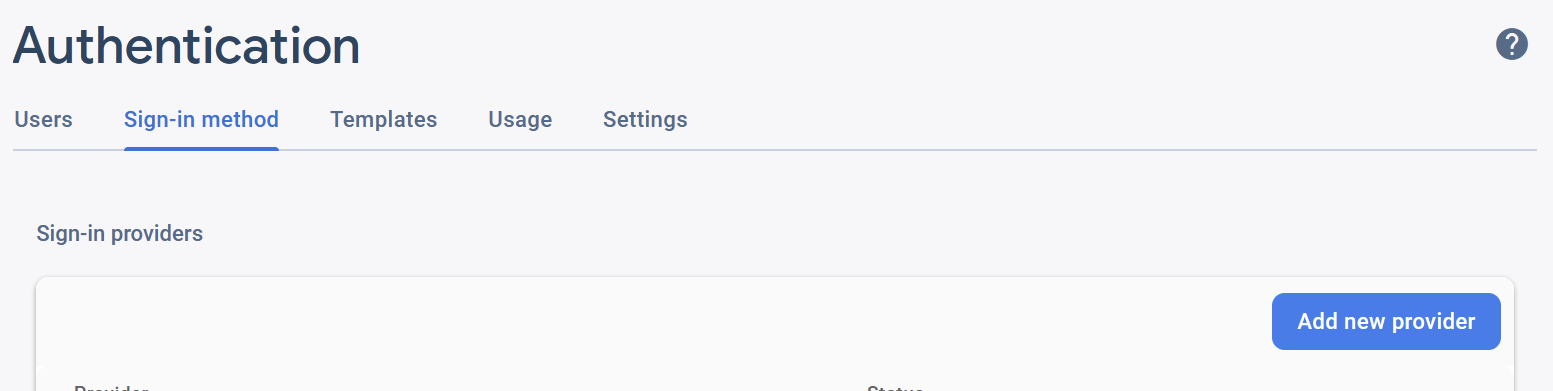
Then go to the Sign-in method tab and click the "Add new provider" button.
Click Apple (duh).
Now you need to give Firebase all the stuff you just went and created in the Apple Developer Console.
- Services ID is the service ID you created before (e.g.
com.myapp.bundleid.service) - Apple team ID is the "App ID Prefix (Team ID)" from the App ID page (e.g,
L2L8TM8R9PR) - Key ID is the key you created before (e.g.,
T28DD93GJ69) - Private Key is the contents of the
.p8file that you downloaded when you created your key.
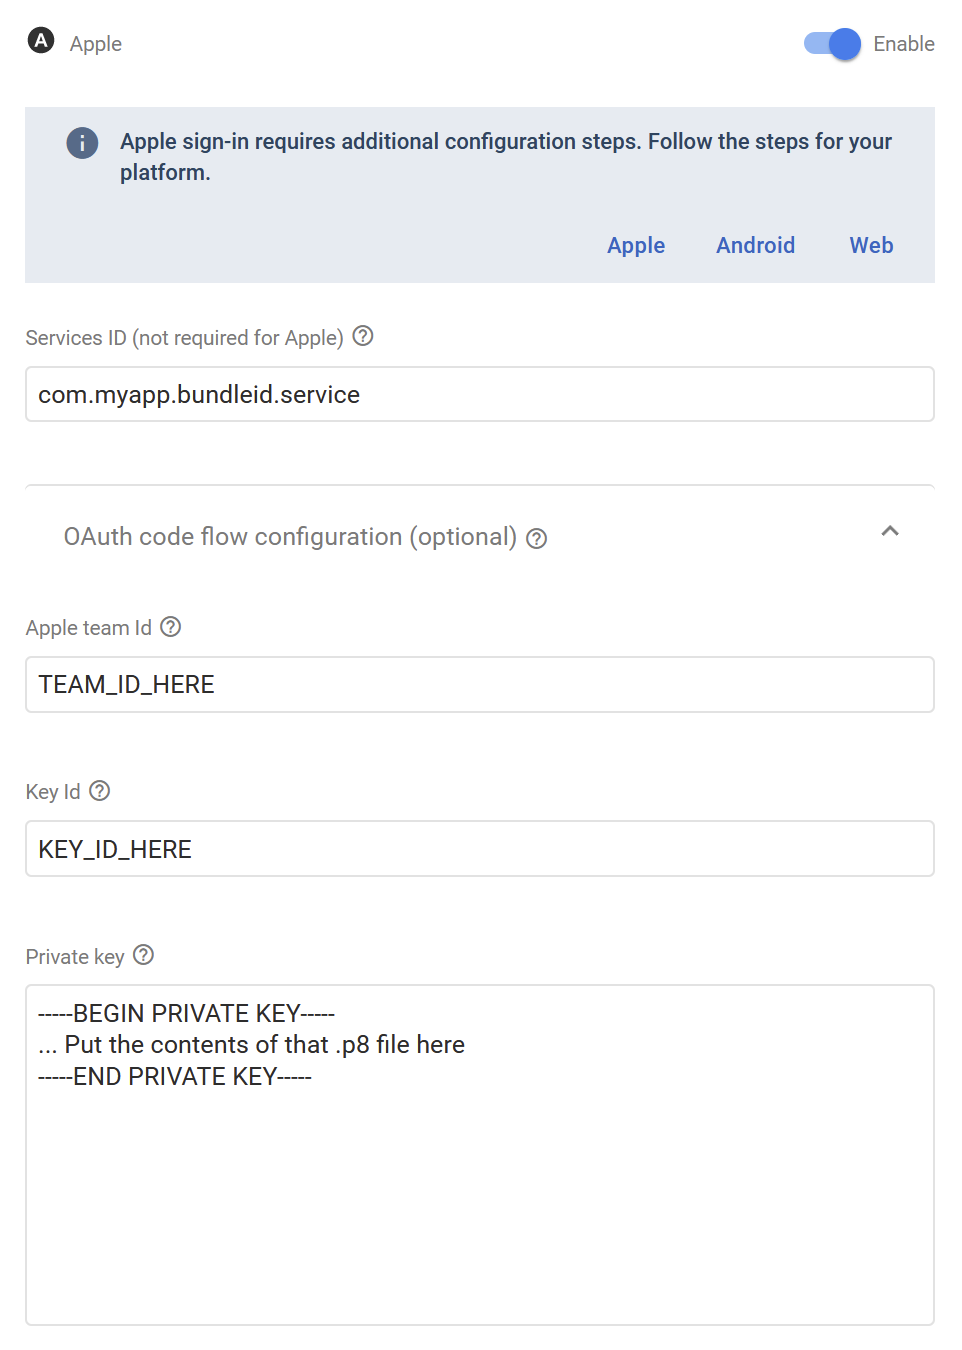
Save all of this stuff. It's what Firebase needs to be your "auth server as a service" for login on Android devices.
(for iOS) Add the "capability" in XCode
On Android you should be good to go (the auth code should just work). For iOS, you need to do one more bit of configuration to allow your app to use the Sign-in with Apple functionality ("capability" in Apple parlance).
<TODO: Add the process for turning on this capability>
Actually write code
Now we get to the fun part: writing some code. First make sure you have the right dependencies:
$ flutter pub add firebase_authThen use the FirebaseAuth package. This is actually the easiest part, which is great: Just two lines (though it could be a one-liner if you want...)
final appleProvider = AppleAuthProvider();
await FirebaseAuth.instance.signInWithProvider(appleProvider);
This will trigger an "auth state change", so you have to set up a listener for this to actually do something with the result:
auth.FirebaseAuth.instance.authStateChanges().listen((user) {
  if (user != null) {
    // The user is logged in! Navigate somewhere ?
  }
});
Comments ()